Zip Pouches, Gift Ideas, Christmas Ideas

Homemade Christmas | Week 2 - Glitta Pouch by @sweetcinnamonroses

IMG_6168.jpg

This week I have a handy pattern for you to have on stand-by for those “oh-my-gosh-I-need-a-present-super-quick” moments. Do you follow @sweetcinnamonroses on Instagram? Laura has some amazing patterns, and almost all of them are on my must-make list but I think the Glitta Pouch is the quickest and easiest of them all. To seal the deal Laura has kindly shared a discount code for Hillstitches customers - see below for more details!

These pouches are tricky to photograph so please believe me when I say they look amazing in real life! I’ve only got photos of two different pouches today - I have made some other ones but they have already been claimed by Miss 2.5. She has squirreled them away somewhere safe and I’m sure they are filled with special treasures.

thumbnail_IMG_6159.jpg

Here’s some hints and tips:

  • Glitter - I found a great range of glitter at my local K-Mart. I think the mid-sized glitter in the little round tubs was the most effective. The really fine glitter just sticks to the vinyl, but it does give the pouch a cool shimmery effect (which you can see in the photo a bit further down). The glitter and sequins do tend to blend in a bit when you use a busy fabric behind the vinyl, but they’re much more obvious if you use a plain/solid fabric.

  • Don’t forget to put a sheet of newspaper on the table when you are using the glitter……..that stuff gets everywhere………apologies to any customers who received some bonus glitter with their recent fabric order! A funnel does come in handy for this step too.

  • Vinyl - I ended up heading to my local Spotlight to purchase the vinyl. I bought the clear vinyl that they have on giant rolls with all the waterproof tablecloth supplies. They did have different weights and the one I chose is quite thick and strong, but next time I might try a thinner one to see if it makes the pouch a bit less bulky. At the moment I am not planning to sell the vinyl through my online shop as it gets very creased during transportation and I would hate for it to arrive in your mailbox looking a bit messy!

  • Pouch size - the pattern does give measurements for three different sizes but once you understand the pattern you can go rogue (like I did below) and make them as big or small as you like! The big one below is the perfect size for holding all the bits and pieces for one of my many hand sewing projects.

IMG_6167.jpg

if you head to Laura's website you can use the code “hillstitches” when you check out to get 20% off the purchase price of the Glitta Pouch! While you’re there check out the rest of her amazing patterns, the Wee Braw Bag has been on my wish-list for a while!

Thanks for reading! Emma x

Tutorials, Link to Free Pattern

Homemade Christmas | Week 1 - Pillowcases

IMG_6027.jpg

It’s only 11 weeks until Christmas. Eeek! Where did 2019 go? This year I’m trying to be more organised than I have been in past years, and I’m planning to make a lot of my Christmas presents (any family members reading this - please act surprised when you open your presents on Christmas morning!).

Over the next few weeks I will be sharing some easy and effective tutorials and patterns here on my blog as I’m sure there’s lots of people out there looking for gift ideas that are a bit different. Perhaps you are on a tight budget for presents this year, or maybe you are looking for ways to help use up your fabric stash and make room for all the amazing new fabric that will be arriving in 2020. Or are you trying to shop small this year and avoid the crowds at the shopping centres? Hopefully you will find these tutorials and patterns useful!

First up - pillowcases. I love the Envelope Pillowcase Tutorial by Aqua Paisley Studios and I have made these pillowcases many times now. They are a great way to use up those large scale prints that get lost when they’re cut into smaller pieces for a quilt, or you can use fun prints to make some unique pillowcases for kids. You can use up to four different fabrics in your pillowcases and it’s lots of fun to play around with different colour combinations. The way these pillowcases are constructed means that the inner pillow is completely covered up and has no chance of being seen!

IMG_6031.jpg
IMG_6029.jpg

The cute foxes in these pillow cases are from the Forest Spirit Range by Felice Regina (@iamlunasol on Instagram) and you can find this range in our online store here. You can also buy complete fabric kits to make the pillowcases for just $19. My kids are already fighting over who gets which one so I guess I’ll be making more! But next I will be making a more grown-up set using this gorgeous large-scale print by Shannon Newlin. In the past I have also used Anna Maria Horner fabric to make pillowcases - they are used whenever there is an Anna Maria Horner quilt on my bed.

IMG_6075.jpg
IMG_6076.jpg

I hope you get to make some pillowcases of your own! Thank you to Samantha of Aqua Paisley Studios for giving me permission to share her tutorial with you.

Emma x

Layer Cake (10" square), Fat Eighths, Link to Free Pattern, Finished Quilts

Disappearing Four Patch Quilt

thumbnail_297713F8-11BE-4858-807D-9176101446D2.jpg

When I’m in a stash-busting mood I always look for a quick and easy yet effective quilt pattern. The Disappearing Four Patch is a handy pattern to keep on hand, as you can easily alter the size of the starting blocks to suit both the scale of the pattern on the fabric, and the amount of fabric that you want to use up. It also sews up quickly and doesn’t have any fiddly pieces, so it could easily come together in a day (oh the luxury of having a full and uninterrupted day of sewing - one day it will happen!)

I had some layer cakes of English Summer by Anna Maria Horner arrive recently (I’d forgotten I’d ordered them!) and as soon as I saw them my fingers started itching with anticipation and my mind started running through potential sewing patterns that would leave the gorgeous large-scale prints mostly intact. There was loads of inspiration on Pinterest (here’s my boards if you would like to see allllll the quilts I want to make one day!)

I used a tutorial by Jen Eskridge of Reanna Lily Designs and you can find the step-by-step tutorial here. The tutorial uses two layer cakes (10” squares) but I only wanted to use one layer cake so my finished quilt is smaller than the tutorial. I also had to cut a couple of co-ordinating Anna Maria Horner fat quarters into 10” squares so that I would have enough blocks to finish the quilt. If you don’t have a layer cake to use up, you could easily cut some fat eighths or fat quarters into 10” squares to make your quilt.

thumbnail_09D890CC-50F6-4A32-96CB-903ECAD64D43.jpg

The blocks are large which means that everything sews up very quickly! I sewed this together over the course of a few days and it was very easy to pick up and put down again. I tried to pair up fabrics that contrasted so that the pattern would show through when all the blocks were joined together. The hardest part was arranging the final blocks and trying not to place the same fabrics next to each other.

thumbnail_C4A543AD-955F-4694-B219-C948862571FD.jpg

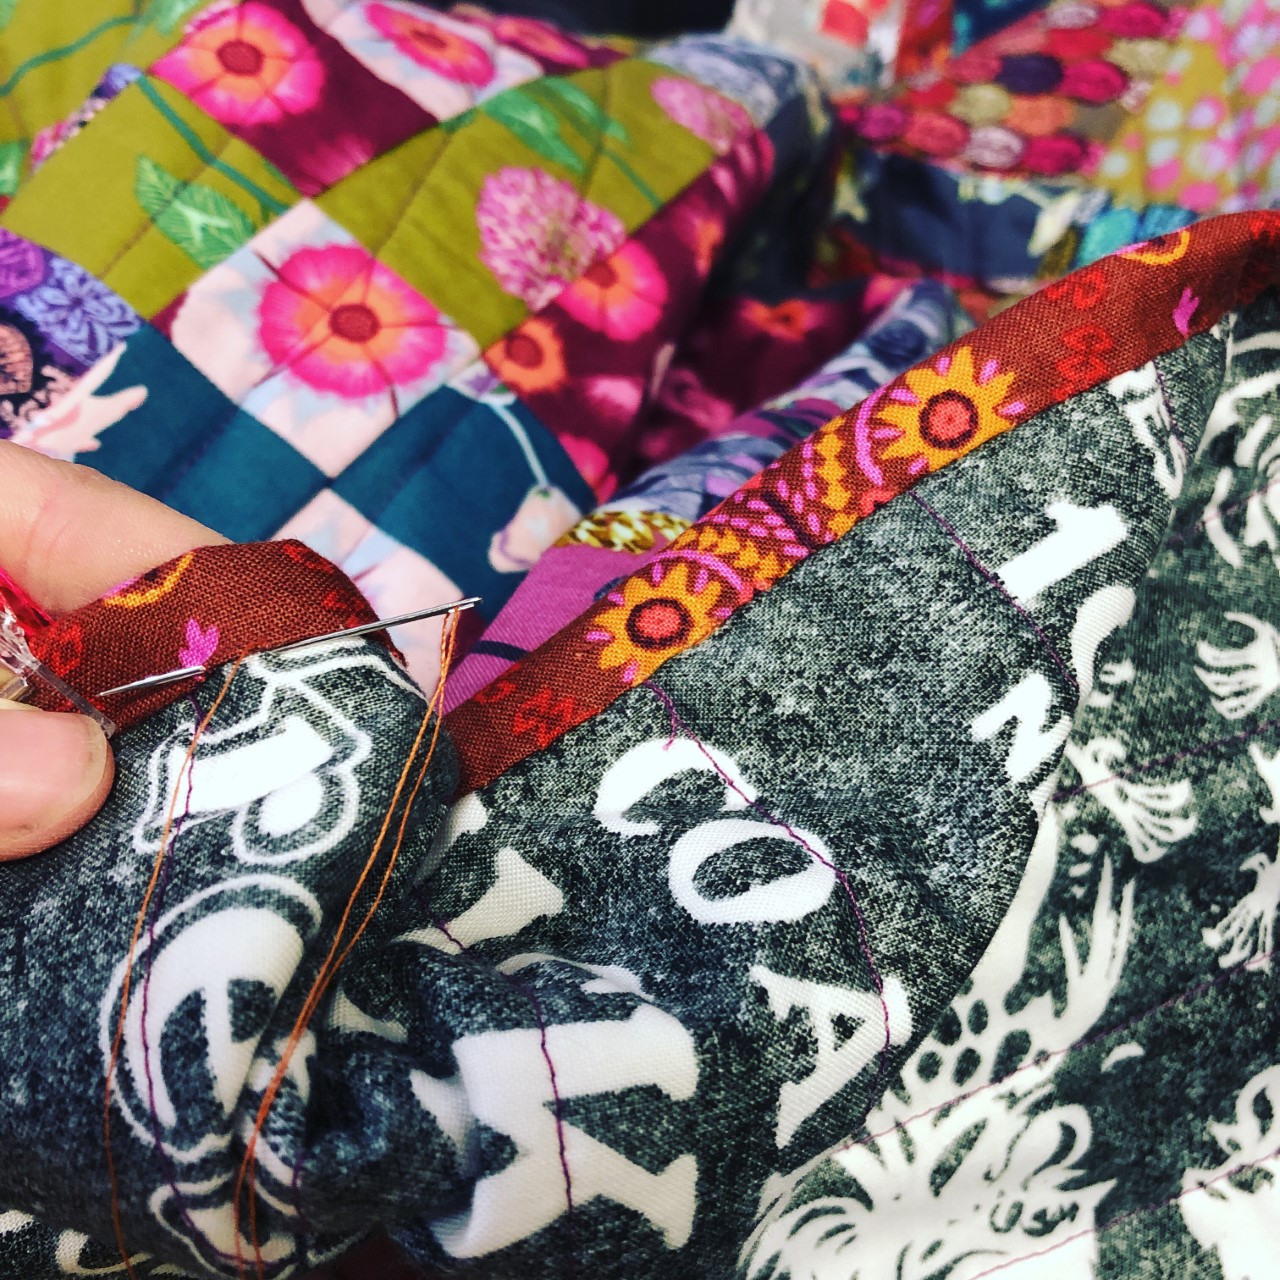
The quilt is backed with a dark grey fabric that is printed with chicken-feed logos (I felt the quilt needed a quiet backing to contrast with the bright front) and I quilted it myself on my Janome Memory Craft 6500 with the walking foot. I traced a quarter-circle at the bottom right hand corner of the quilt using a dinner plate and my Hera marker, and then followed this line leaving about 2” between each row. I used a dark purple thread to quilt with. The quilt is bound using this fabric from Tambourine by Anna Maria Horner as I felt it complemented all the colours in the quilt, even though it is from a different fabric range. I love how different fabric ranges work together!

The finished size of this quilt is 52” x 72” (1.3m x 1.82m) so it’s perfect for use on a single bed or for use on the couch while watching a movie.

Emma x

Work in Progress

Trying to use up fabric + Ebbing Quilt

I've been looking through my fabric stash and my work-in-progress (WIP) pile (almost 60 different quilts on the go - but I'll talk about that in another blog post!) and feeling a bit overwhelmed. I'm sure a lot of you are feeling the same way. We buy fabric faster than we can use it, and then spend lots of time cutting it into little pieces, then spend more time sewing those little pieces back together. I don't want to destash my fabric - I bought it because I loved it and I want to use it. 

So I've decided to to make some quilts that will use up large amounts of fabric in a short amount of time. Over the next few weeks I will be sharing these quilts and other projects with you, and together we will get that fabric off the shelf and into use, and make more room for new fabric at the same time! I will also share some of my tips to help you make the most of your sewing time, especially if you're like me and have to squish your sewing time in amongst work, family life and house stuff. 

The first quilt on my list is the Ebbing Quilt, which is a free tutorial on the Cloud 9 website. I'm making mine a bit bigger than the pattern, so that I'll use up a bit more fabric and have a finished quilt that is more useful at my house. We don't do small quilts here!

Here's my biggest tip to make sewing time fit into your busy life - do lots and lots of small sewing sessions whenever you find a spare 20 minutes. I've got a 6 year old son, a 14 month old daughter and a chef husband that works odd hours, as well as working part-time myself. I rarely get any extended uninterrupted sewing time, so I make sure I sneak in some sewing time whenever I get a spare minute to myself! 


For the Ebbing quilt, I had a fabric bundle ready to go (Reminds Me Of Vintage Sheets) so I didn't have to spend much time selecting fabric. I leave my cutting mat out on one end of the kitchen table so that I can cut out a few blocks every now and then - you can cut out a lot of large blocks in a couple of spare minutes, especially if you stack two or three fat quarters and cut through all three layers at once. I'm lucky enough to have a separate desk for my sewing machine so it is always set up and ready to go, so I chain pieced the background fabric onto the blocks in 5 or 10 minute bursts. Next job is to trim all the blocks in one go, then iron them all. I've almost joined all the large and middle sized blocks now - joining the blocks is my least favourite part and I've learnt that if I join my blocks as I go, I'm more likely to finish the quilt!


IMG_1450 (1).jpg

Over the next week or two I will start cutting out the smallest blocks and sew on the background fabric whenever I find a spare minute. It won't take long to join these small blocks and add them onto the bigger blocks, and then hopefully I will have a finished quilt top to share with you soon!

Emma x

Tutorials

Giant Log Cabin Quilt - Tutorial

IMG_0687.JPG

I loved making this quilt. I loved using the bright colours and different scale prints by Anna Maria Horner. And the mixture of traditional quilting cottons and Loominous woven fabric just added a whole extra level of texture! It's backed in a silky Anna Maria Horner wideback. It's just the best quilt. Although I'll probably say that about my next finish too.

This quilt top came together really quickly and was finished in early October 2017. It was then folded away until March this year when I quilted and hand-bound it in record time so that it could be used as a display at my first quilt show stall. 

I've had a couple of queries about a pattern for this quilt so I thought I'd have a go at writing up a tutorial. I'm sure there are lots of other giant log cabin quilts out there as it is such a traditional block. Please respect the work that I put into creating this tutorial/pattern, and ensure that you direct people here to my website/blog to obtain their own copy of this tutorial/pattern. I'd love to see your own versions of this quilt so please tag me (either @hillstitches or @hillstitchesfabricshop) when you share it on Instagram. 

If you look closely at the photo above, you will notice that there are three different blocks in this quilt. I did this to mix things up a bit and it keeps your eyes moving around the quilt. Plus a bit of asymmetry keeps things interesting.  I'll refer to each type of block based on where the skinny strip is located. There is one block (lets call it Skinny Inner) which has a thinner border right next to the starting square. Then there is Skinny Middle, which has a thinner border in the middle round, and then Skinny Outer, where the outer strip is the thinnest strip. Does that make sense?

I'm also going to assume that you will have an understanding of how a quarter log cabin block is constructed, how to use 1/4" seams etc. 

I used several Anna Maria Horner Floral Retrospective factory cut Fat Quarter bundles to make this quilt, and added in a few co-ordinating fat quarters from the shop. There is always room for more Anna Maria Horner fabric in your stash so clicking here will take you straight to all the Anna Maria Horner fabric available at Hillstitches. 

I used at least 20 fat quarters in this quilt, and there was some fabric left over.  You may wish to use more than 20 fat quarters if you would like an even scrappier-looking quilt.  I'm one of those people who cuts and sews one block at a time, and I sometimes join blocks as I go so that the colours are balanced throughout the quilt. Each completed block is 18 1/2" square (18" square in the finished quilt).

SKINNY INNER BLOCK

Centre square - cut one square 5 1/2" x 5 1/2"

Round one (skinny round) - cut one strip 3 1/2" x 5 1/2", cut one strip 3 1/2" x 8 1/2"

Round two - cut one strip 5 1/2" x 8 1/2", cut one strip 5 1/2" x 13 1/2"

Round three - cut one strip 5 1/2" x 13 1/2", cut one strip 5 1/2" x 18 1/2"


SKINNY MIDDLE BLOCK

Centre square - cut one block 5 1/2" x 5 1/2"

Round one - cut one strip 5 1/2" x 5 1/2", cut one strip 5 1/2" x 10 1/2"

Round two (skinny round) - cut one strip 3 1/2" x 10 1/2", cut one strip 3 1/2" x 13 1/2"

Round three - cut one strip 5 1/2" x 13 1/2", cut one strip 5 1/2" x 18 1/2" 


SKINNY OUTER BLOCK

Centre square - cut one block 5 1/2" x 5 1/2"

Round one - cut one strip 5 1/2" x 5 1/2", cut one strip 5 1/2" x 10 1/2" 

Round two - cut one strip 5 1/2" x 10 1/2", cut one strip 5 1/2" x 15 1/2"

Round three (skinny round) - cut one strip 3 1/2" x 15 1/2", cut one strip 3 1/2" x 18 1/2"


I hope you have fun making your own Giant Log Cabin quilt, don't forget to tag me @hillstitches/@hillstitchesfabricshop so that I can see the photos of your finished quilt!

Emma x


Let's start at the beginning.......

HS_logo_FA.jpg

Hello! I'm Emma. Hillstitches has been a dream of mine for a long time, and I was very excited when it became reality in 2017. It has been lots of fun choosing fabric for the store and I could spend hours and hours scrolling through Pintrest and Instagram looking at quilts and patterns. I think my favourite part is mixing up fabric from different designers and ranges to create unique bundles.

IMG_0949.jpg

I also love to find daggy/vintage quilting books and magazines from the 70's and early 80's, as they are full of patterns and inspiration. Plus there are so many rulers and cutting tools available now which means that the patterns are a lot easier and faster to recreate! 

Every now and then I'm going to pop in here and share what I'm making. This will be a place to share my projects, my colour schemes and ideas, and to provide links to patterns and other sources of inspiration. Please let me know if there is anything else you would like to see!

Emma x